The Hidden Costs of DIY Lock Repairs and How to Avoid Them. In a bustling city…
How to Easily Change a Door Lock Cylinder Without a Key
How to Easily Change a Door Lock Cylinder Without a Key
How to easily change a door lock cylinder without a key. Changing a door lock cylinder without a key might sound daunting, but with the right approach, it’s a task that can be mastered with ease.
Whether you’re a budding entrepreneur setting up your first physical store or an established business owner looking to enhance security, understanding this process can save you time and money.
How to Easily Change a Door Lock Cylinder Without a Key
In this guide, we’ll break down the steps in a straightforward manner, empowering you to undertake this task confidently.
Equip yourself with the knowledge to handle such practical challenges efficiently, ensuring your business premises remain secure and well-maintained.
Dive in to discover how you can seamlessly replace a door lock cylinder without the need for a key.
Understanding Door Lock Cylinders
Types of Lock Cylinders
Before diving into the replacement process, it’s crucial to understand the different types of lock cylinders.
The most common types include:
- Euro Cylinder Locks: Widely used in residential and commercial properties. They are known for their simplicity and ease of replacement.
- Mortice Locks: These are embedded into the door itself and offer a higher level of security. They are commonly found in older buildings.
- Rim Locks: Mounted on the surface of the door, rim locks are typically used for secondary security, like on internal doors.
Each type of lock cylinder has its unique characteristics and security features.
Familiarising yourself with the type of lock cylinder you are dealing with will help you choose the right replacement and follow the appropriate steps for removal and installation.
Knowing the distinctions can ensure you select the best option for your security needs.
Common Reasons for Replacement
There are several reasons why you might need to replace a door lock cylinder without a key.
One common scenario is losing the key, which makes accessing the premises impossible without changing the lock.
Another reason could be a malfunctioning lock, where wear and tear have compromised its functionality, posing a security risk.
Security upgrades are also a frequent cause for replacement.
As technology advances, older locks may not provide adequate protection against modern burglary techniques.
Upgrading to a more secure lock can enhance the safety of your business premises.
Lastly, rekeying for new ownership or tenancy is another reason.
When you take over a new property, changing the lock cylinders ensures that previous keyholders do not have access.
Understanding these common reasons helps in recognising when it’s time to take action and replace the lock cylinder.
Step-by-Step Guide to Changing a Lock Cylinder
Gathering Necessary Tools
Before beginning the lock cylinder replacement, ensure you have all the necessary tools on hand.
This preparation will make the process smoother and more efficient. Here’s a list of essential tools you’ll need:
- Screwdrivers: Both flat-head and Phillips screwdrivers are usually required to remove screws from the lock and door.
- Allen Keys: Some locks have hex screws that will require Allen keys for removal.
- Pliers: Useful for gripping and removing small components.
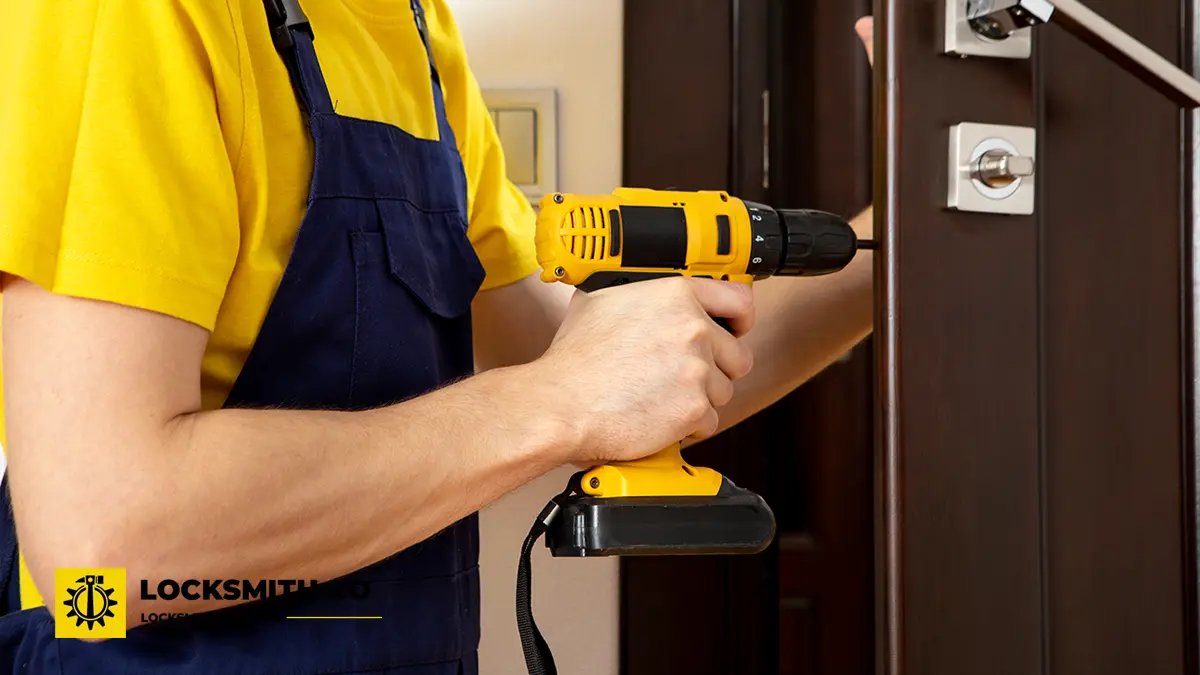
- Drill: In situations where the lock is particularly stubborn, a drill can help remove screws or even drill out the lock cylinder.
- Tape Measure: Ensures you measure the new cylinder accurately to match the existing one.
- Replacement Lock Cylinder: Have the new lock cylinder ready, ensuring it matches the type and size of the existing one.
Having these tools ready beforehand will save you time and potential frustration, allowing you to focus on the task at hand.
Removing the Old Cylinder
Once you have gathered your tools, the next step is to remove the old lock cylinder.
Start by locating the screws that hold the lock in place. These are usually found on the edge of the door.
Using the appropriate screwdriver, carefully unscrew these and keep the screws in a safe place.
If the cylinder is stuck, you may need to use pliers to gently wiggle it free.
For Euro cylinder locks, you will need to turn the cam to align it with the lock body to slide the cylinder out.
In some cases, the lock may require drilling if it’s particularly stubborn or if you do not have the key.
Ensure you take note of how the old cylinder fits into the door, as this will help you when installing the new one.
Removing the old cylinder correctly ensures that the new one can be installed without issues.
Installing the New Cylinder
After successfully removing the old cylinder, it’s time to install the new one.
Begin by inserting the new lock cylinder into the door, ensuring it aligns perfectly with the slot.
For Euro cylinder locks, make sure the cam is in the correct position to fit into the lock body.
Once the new cylinder is in place, secure it by reattaching the screws you removed earlier.
Tighten them firmly, but avoid over-tightening, which can damage the lock or door.
Check that the cylinder is properly aligned and sits flush with the door’s surface.
Test the new cylinder by turning the cam and ensuring it operates smoothly.
If everything works correctly, the lock should engage and disengage without any issues.
This final step is crucial for ensuring the new lock cylinder functions as intended, providing the security and ease of access you require.
Related Locksmith News!
Comments (0)